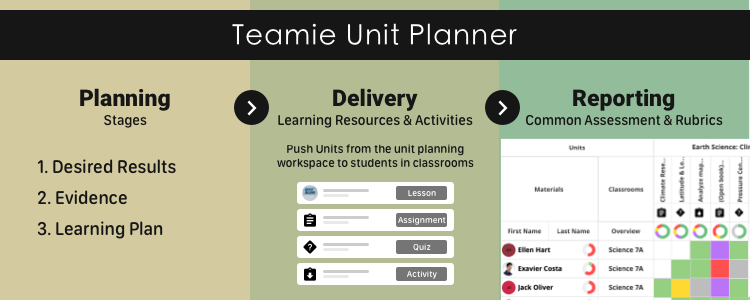
We are pleased to announce that we have added a new feather in our features cap – Unit Planner! A unit planner can be a great tool for curriculum planning which essentially aims to organise various elements of a curriculum, such as the core objectives (e.g. a standard/competency to achieve), subject, unit definitions, activities, assessments, and lessons.
On Teamie, a unit planner is a common classroom where workspace members can create common assessments linked to standards that are then pushed to all the classrooms (of the same cohort, i.e, same grade, subject and academic session) which would provide evidence of learners’ understanding. A unit planner can have the structure (desired results, evidence and learning plan) for learning through lessons with instructional activities and resources that can be delivered with assessments.
Curriculum heads and staff can use the unit planners to enter and view the progress and results for learners across the cohort in a single view, tracked by standard, assessment & lessons.
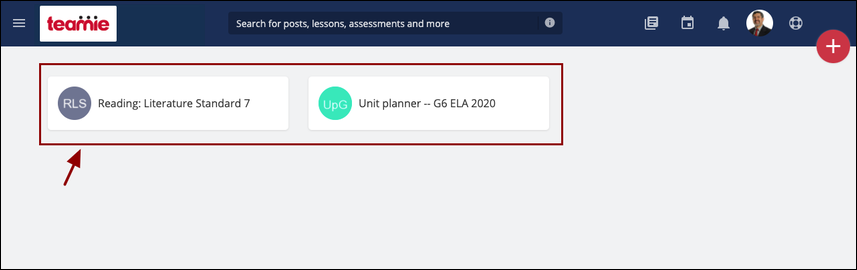
Note: ‘Unit Planner’ is a whitelabelled term and can vary from site to site. For example, ‘Curriculum Planner’, ‘Workspace’ etc can be configured instead of ‘Unit Planner’ as per your Teamie site’s configuration.
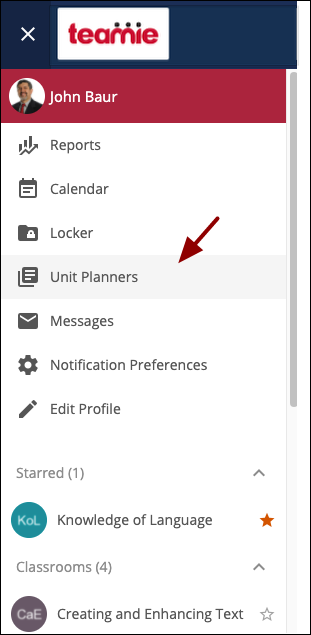
Once users are given access to the required grade(s) and subject(s), they can be added as workspace members or workspace administrators in the unit planners of the corresponding cohorts. A cohort will refer to a set of classrooms that have the same value for certain defined fields that define a cohort which are typically configured as Academic year, Grade and Subject.
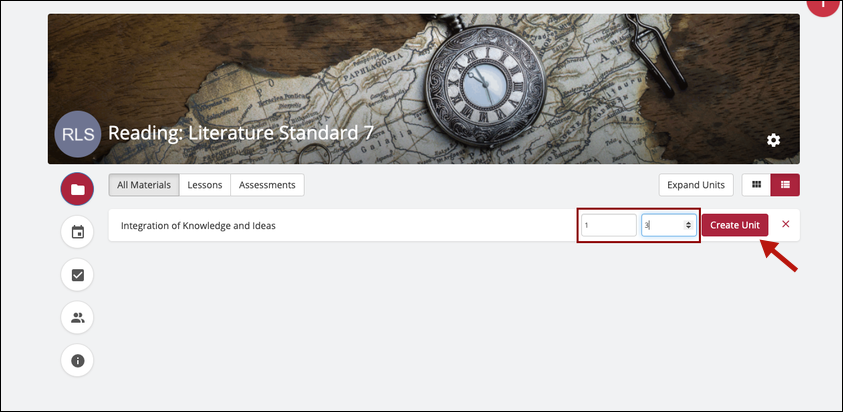
Unit Creation
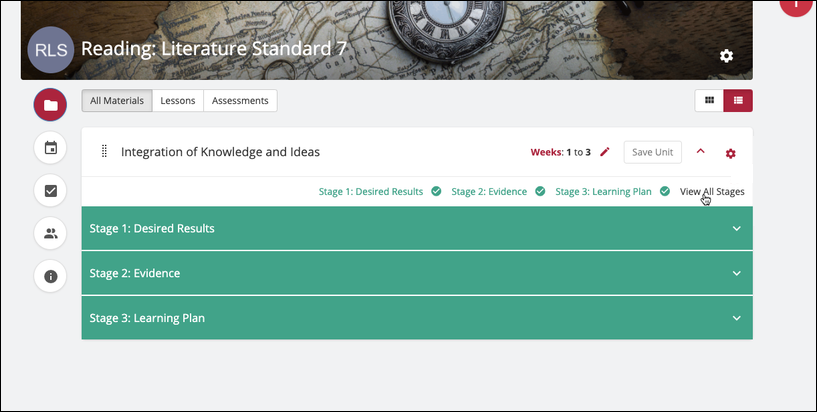
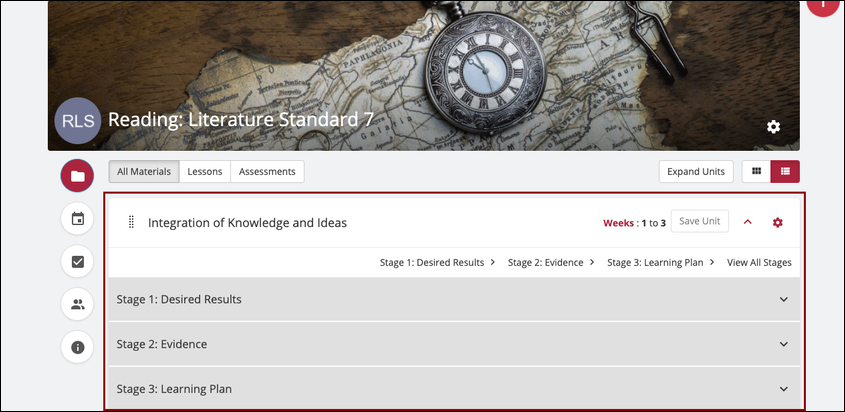
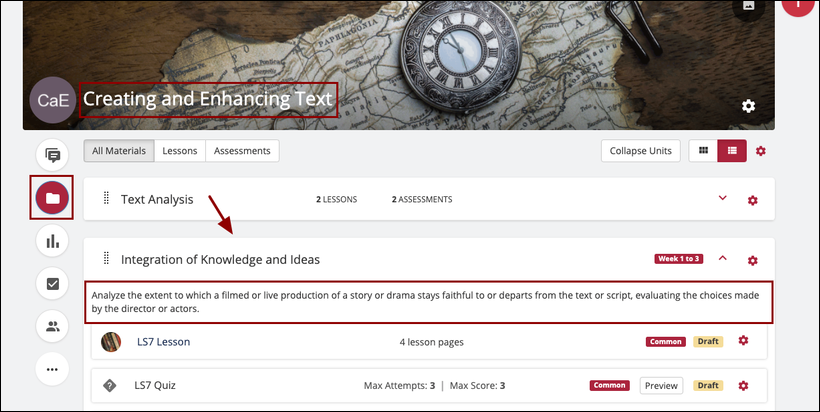
Workspace users can create units in the unit planner and add the required From Week and To Week information. Based on these weeks, the units will be mapped to the Curriculum Map of the unit planner.
Each unit will encapsulate the 3 stages of Understanding By Design (UBD), filterable by a specific stage:
- Stage 1: Desired Results
- Stage 2: Evidence
- Stage 3: Learning Plan
Stage 1: Desired Results
In Stage 1, you can add the unit overview and map the learning objectives to the unit. Learning objectives that are mapped with the cohort (grade, subject and academic session) of the unit planner will be shown. Based on your site configuration, you can select the parent strands and / or their child standards to attach as the objectives.

Note: In case, site-level competencies are configured on your Teamie site, then you will be able to map those too to a unit. Furthermore, you can also attach pedagogical Concepts (such as Power, Justice, Equality) to a unit, if configured on the site.
In addition to the aforementioned, the following sections are present in the Stage 1: Desired Results for creating a unit:
- Essential Questions
- Enduring Understandings
- Learning Targets
In all of the 3 sections, you can add textual content (with rich text formatting) along with attachments from your system or file-sharing services, such as, OneDrive and GDrive (if configured on your Teamie site).

Stage 2: Evidence
In this stage, workspace members can create assessments (quizzes, assignments and offline tests) that are to be common throughout the course. Creation of these assessments will be the same as the classroom workflows. Each assessment can be marked as formative or summative, and can be graded through a rubric. The rubric may contain standards (objective populated as per the cohort) and/or custom criteria and scales.
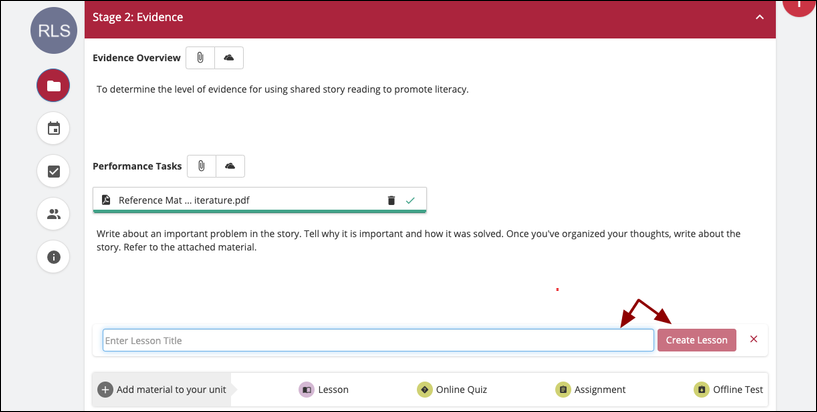
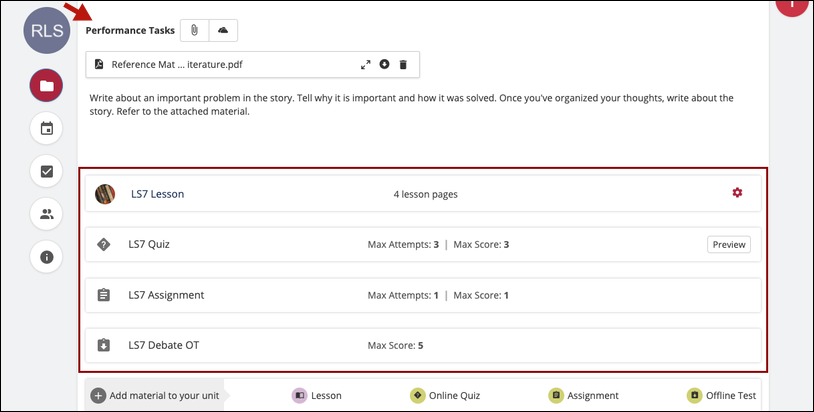
There are two categories a created assessment can go into – Performance Tasks and Other Evidence of Learning. Workspace users can reorder assessments within each of these categories.
The performance tasks can be used to ask learners to demonstrate their understanding, or evidence like assignments and quizzes.
Other evidence of learning can include assignments and quizzes on knowledge of the learners along with grading using rubrics to address specific target areas of an essay.

Note: No material will have the publishing options (including the available from and available till options) available to them. They can only be pushed to classrooms where they can be published. Once pushed the materials’ content cannot be changed along with its major settings.
There is an evidence overview section present where you can enter the required text and attachments (Google Drive/OneDrive attachments will be available as per your site’s integration) to provide an outline of the section.

Stage 3: Learning Plan
The third stage of s unit is primarily to plan for the learning through lessons which will be created with a similar workflow as in the classrooms. Each lesson will contain pages that can contain text, media and embedded content. Instructors can also create quizzes and assignments to be delivered as part of the lesson or as standalone materials. Firstly, you can add the content and attachment(s) to outline the overview of this section.
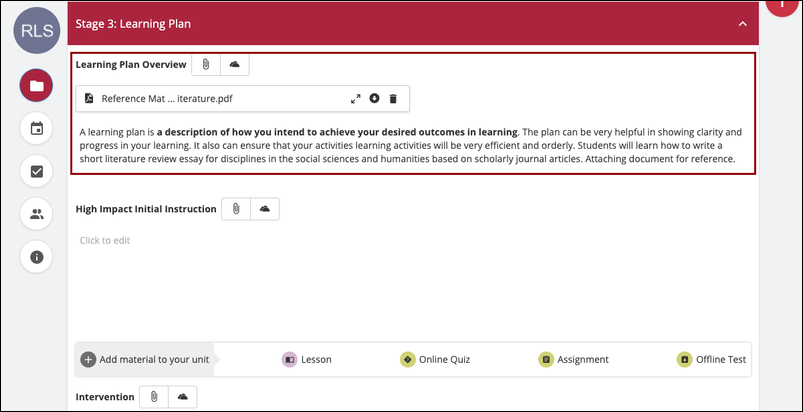
Similar to Stage 2: Evidence, there will be categories in the learning plan – High Impact Initial Instruction and Intervention, where materials can be added and reordered within.


Once you have completed the section(s) and saved the changes, the section color will change to green (in the collapsed state) to indicate that the stage has been completed. Stages are considered to be completed if all the fields inside have been assigned some content. For text fields, this will include either text or attachments. Materials are not required to be added to complete the stage.

You can click any of the 3 stages to expand/collapse them or click View All Stages to expand all the stages at once.
Tip: You can copy the shareable URL for each unit within the unit planner by expanding the unit and copying the URL from the address bar. Take note that only one unit can be opened/expanded at a time to copy the link and share it with other members of the unit planner.

Once the stages of planning are complete, workspace members can now push the unit to their cohorts’ classrooms (which will be non-editable in the classrooms they are pushed to).
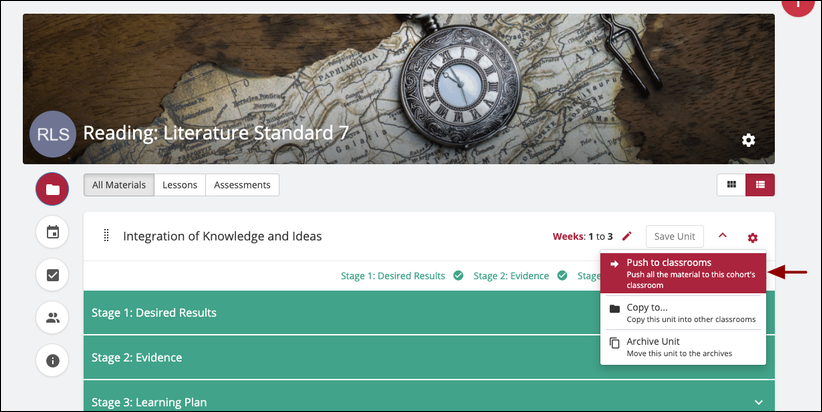
While pushing, the classrooms from the current unit’s cohort (grade and subject) will be shown for the academic session and upto 5 classrooms can be picked at once to push in the unit materials.

When a unit is pushed to a classroom, a new section is created in that classroom linked to the unit. This section can be edited or deleted by the classroom’s instructor, though that will not remove the lessons/assessments inside and they will be moved to the previous section available. The section will have its description pre-filled with the unit’s overview or any other section as per the site’s configuration.
Performance View
The unit planner will have the Performance tab where you can track the performance of the learners on the basis of the 3 views – Assessment performance, Materials Progress and Mastery Performance.
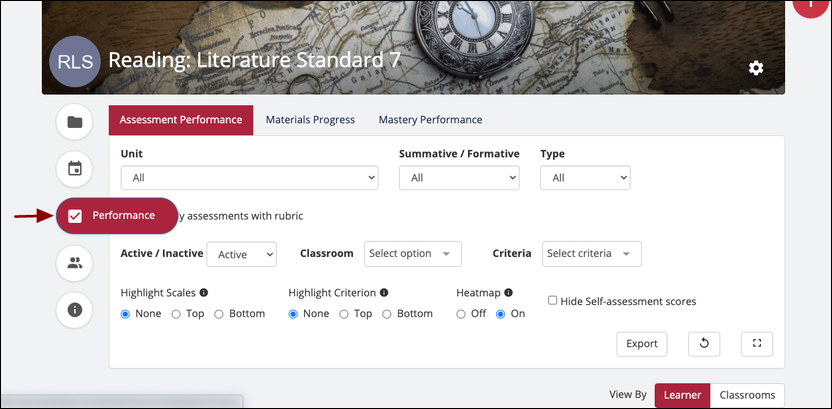
Each view will be a tabular view with filters and have two “modes” – By student or By classroom. When viewed By student, each of the students will be listed as a row and their data will be shown directly. Whereas when viewed By classroom, each classroom will have a row, and the classroom’s students data will be aggregated and shown as a donut.
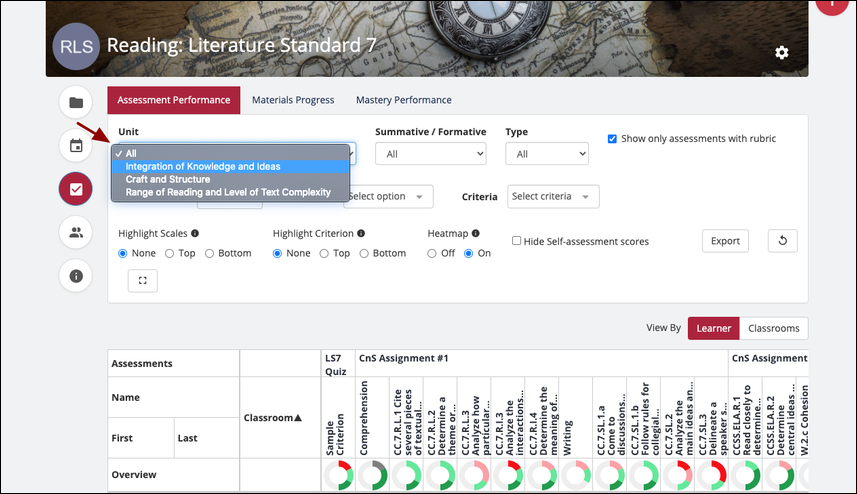
Assessment Performance
The Assessment Performance is the default sub-tab shown on the Performance tab. This view consists of columns for all the common assessments’ rubric criteria. Each criteria will be categorised by the assessment, which in turn will be categorised by the unit.

You can also quickly filter the data in the Assessment Performance view of a unit planner by the units present in the unit planner, the classrooms in which the units are pushed, different criteria etc.
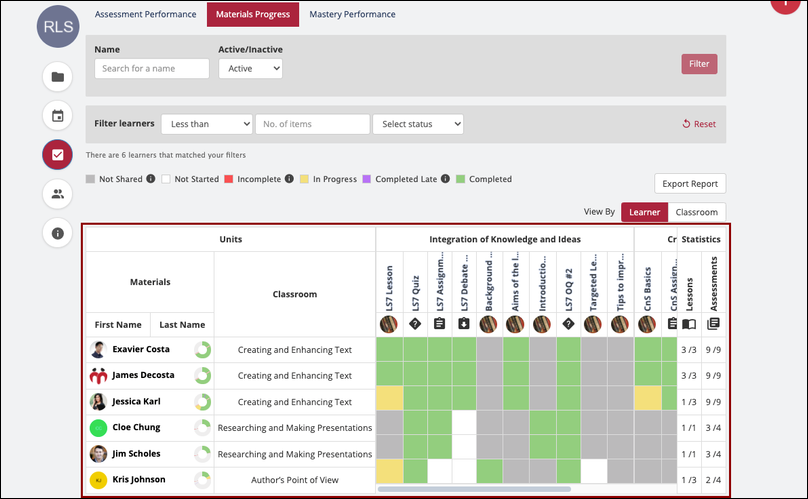
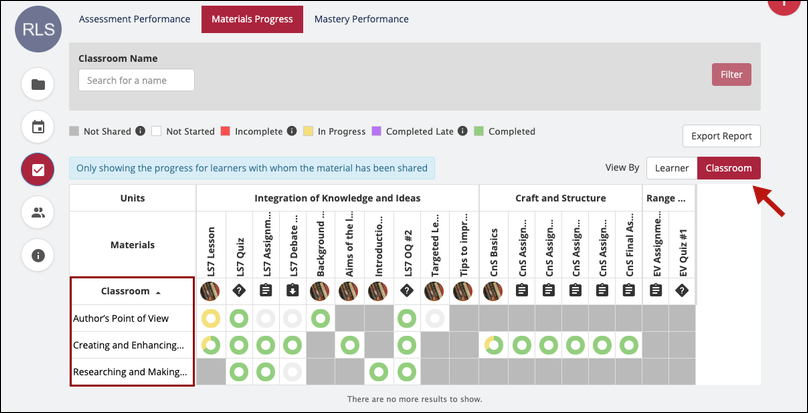
Materials Progress
The second sub-tab on the Performance tab is Materials Progress. This view will show the dashboard data view of all the common assessments and lessons created in the unit planner and will be categorised by their respective units.
The common assessments and lessons will be listed in the same order in which they are organised in the units. Each cell will have the learners’ status in the assessment/lesson, which could be one of the following:
- Not Shared
- Not Started
- Incomplete
- In Progress
- Completed Late
- Completed
Mastery Performance
The third sub-tab on the Performance tab is Mastery Performance which shows the data from the Mastery View of the classroom, shown for the learners from the entire cohort.
Each cell will have the overall score that has been given to the learner for that criteria, across all the learner’s classrooms.
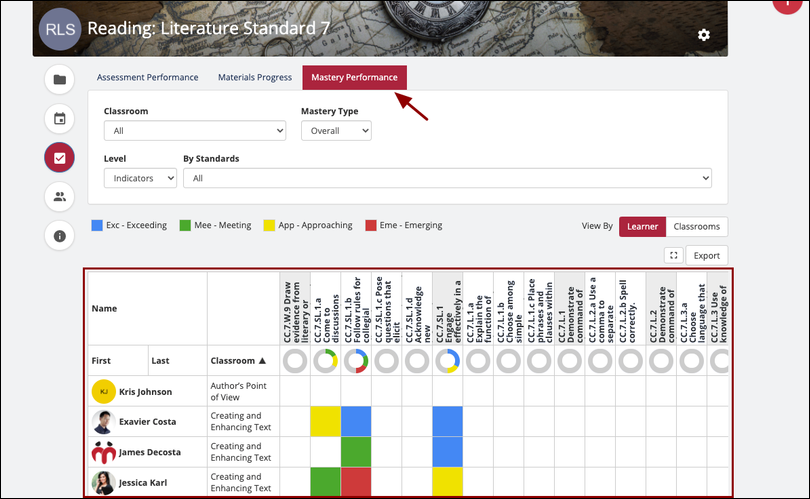
Each of the aforementioned views has a tabular view with filters and two “modes” – by Learner or by Classrooms. When viewed By student, each of the students will be listed as a row and their data will be shown directly. Whereas when viewed By classroom, each classroom will have a row, and the classroom’s learners data will be aggregated and shown as a donut.

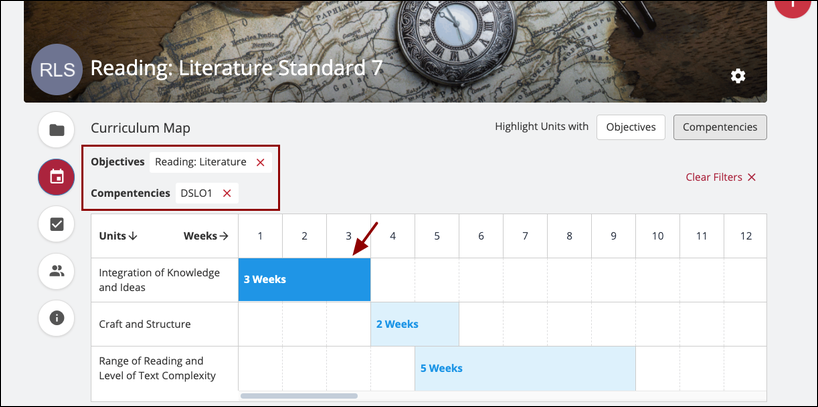
Curriculum Map
The Curriculum Map incorporates a timeline chart view that lists all the units and the weeks they are scheduled to be taught in.
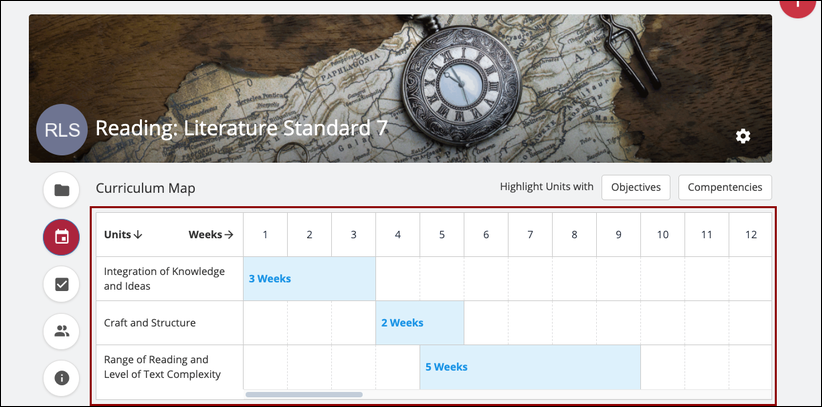
The curriculum map has the filters on the page for Objectives and Competency (if enabled), allowing users to highlight the units that have been mapped to a selected Standard/Competency.
Click here to learn more about creating and managing units in a unit planner. We would love to hear your thoughts on the introduction of the unit planner in Teamie. Give us a shout-out. You can also write to us via our support channel in case you are interested in leveraging this feature for your Teamie site.