Hello everyone! We hope you all are doing well. We are here to share the details about our latest update – Teamie Hatsya (2.7)! This update primarily focuses on revamping and enhancing the quiz workflows, such as tagging quiz questions while giving feedback, migrating the quiz creation workflow to Dash along with the addition of rubrics to the quizzes.
Before we talk more about this update, let’s first take a look at its TL;DR version:
- Quiz creation now migrated to Dash
- Rubrics can now be attached to the quizzes
- Quiz questions can be tagged while giving feedback
- Zoom integration in calendar events
- The list of all the calendar events can now be exported
- Configuration to always show materials overview in lesson pages
- Completion date filter for group credits completion view
- Default section description, lesson description and lesson page titles can now be customised at the site level
Quiz creation now in Dash
In a bid to move the Teamie platform completely to Dash, we have now migrated the long due quiz creation process to Dash. This will bring more uniformity for the end user to create and manage content on Teamie.
To ensure a smooth transition and minimum on-boarding, we have kept the quiz creation workflows uniform and similar to the existing one. When a quiz is created, it will be created in the draft mode as before. Instructors need to click it to open the quiz in the edit mode and add questions to it.


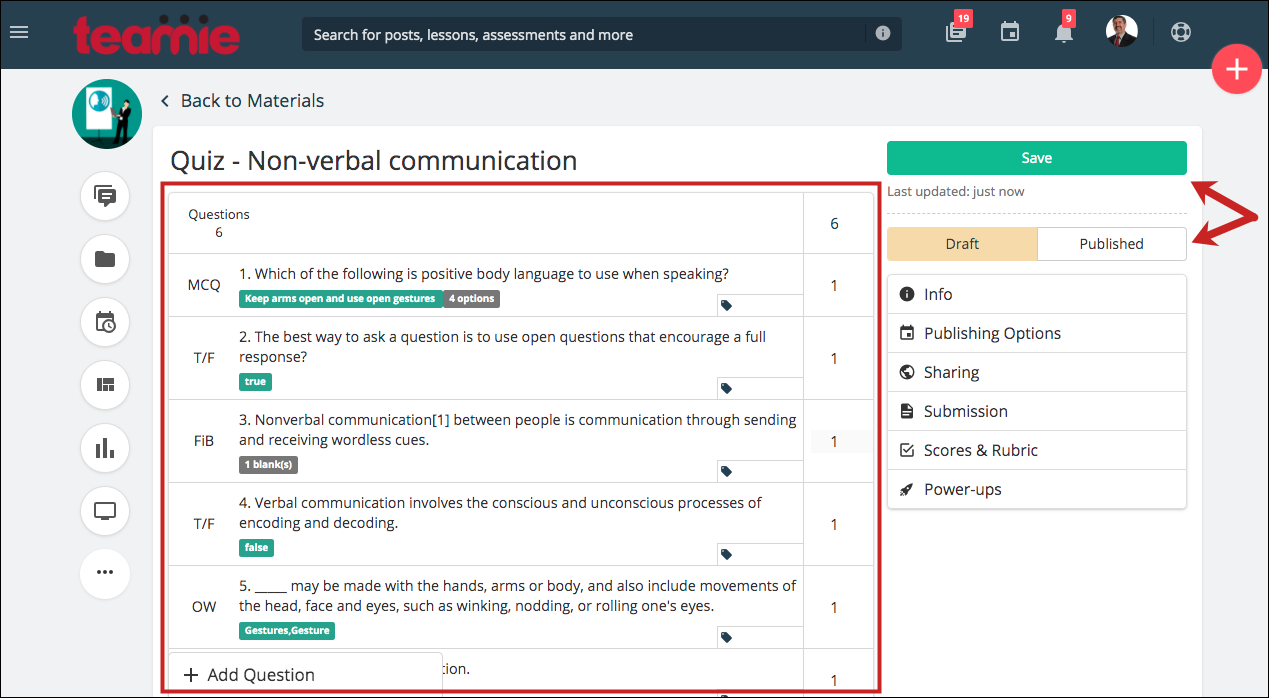
As an instructor, you can choose from the six types of quiz questions to add to the quiz.

The settings are also kept consistent with the previous workflows and instructors can edit the quiz settings as before.
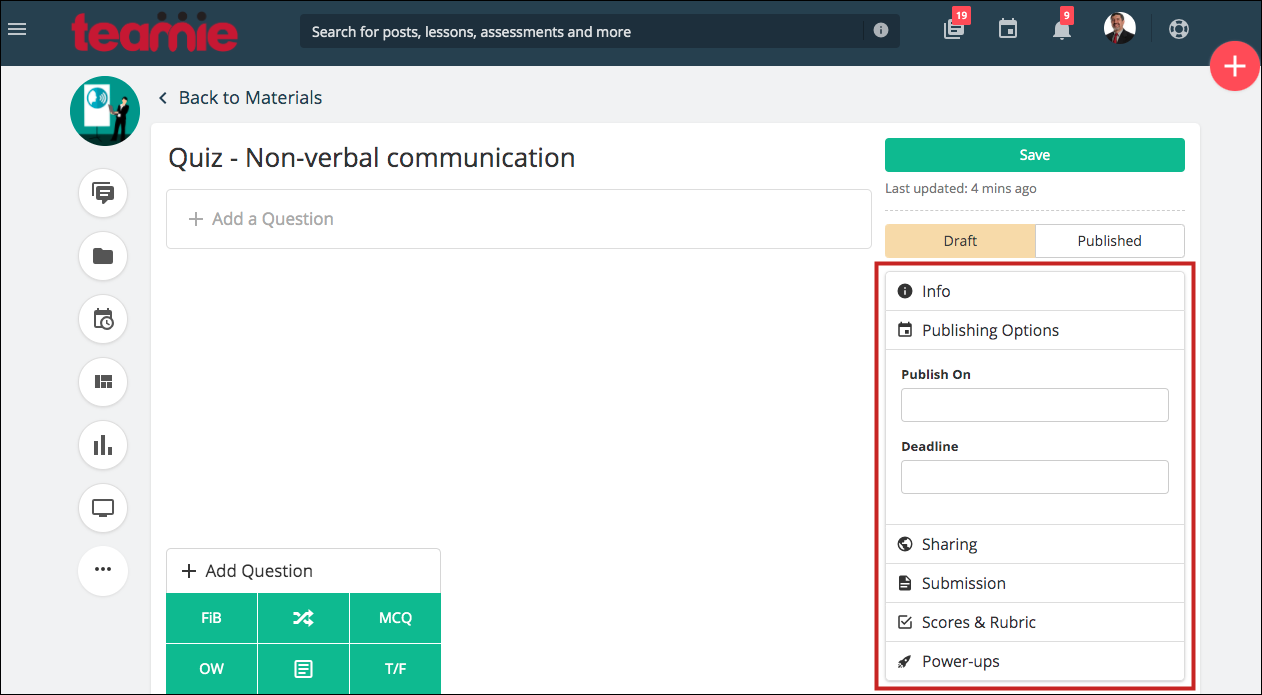
One key addition that you will notice is the Rubric setting in the Scores section. We will discuss this enhancement in the next section. Furthermore, there is one setting change that we have made. “Shuffle MCQ Questions” setting is now shown under the Power-ups section instead of the Submissions section.

Similar to the previous workflow, once you have added the required questions, you can publish the quiz immediately or on a specific date using the Publishing Options setting.
Now, let’s discuss the addition of rubrics to quizzes on Teamie.
Attaching Rubrics to quizzes
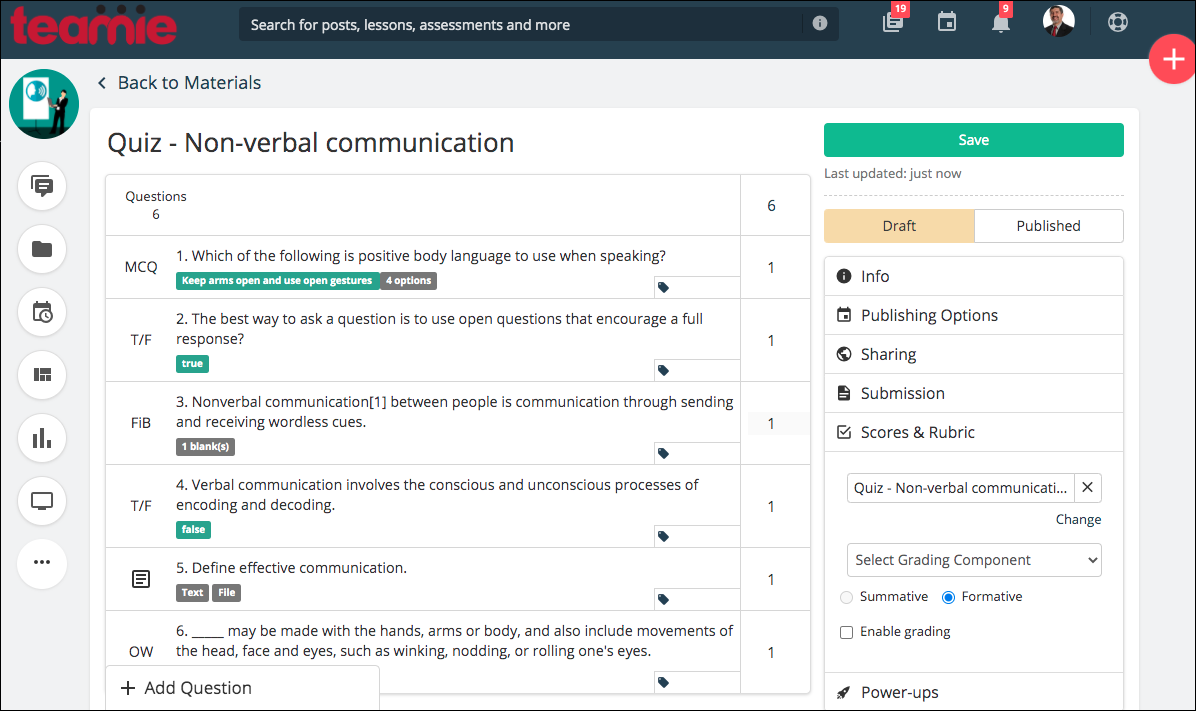
You can now attach rubrics to quizzes, allowing the instructor to assess and provide feedback on specific criteria. As aforementioned, the Scores section now includes Rubric settings as well.

Similar to other types of assessments (assignments / offline tests), you can select a rubric from My Rubrics / Rubric Bank or create a new one by adding criteria and objectives. Then, attach it to the quiz.
| ? You can only choose from the Non-Scoring rubrics to attach to a quiz. |
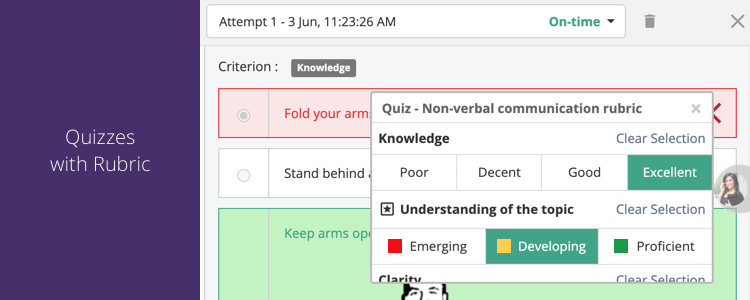
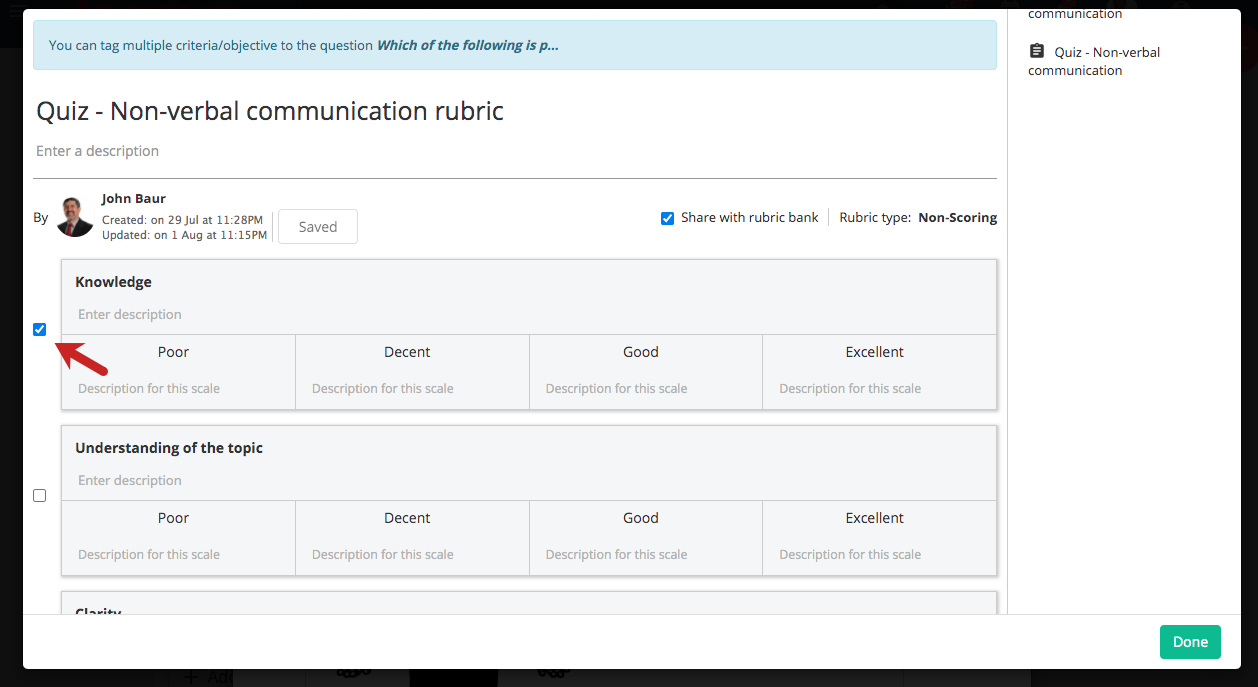
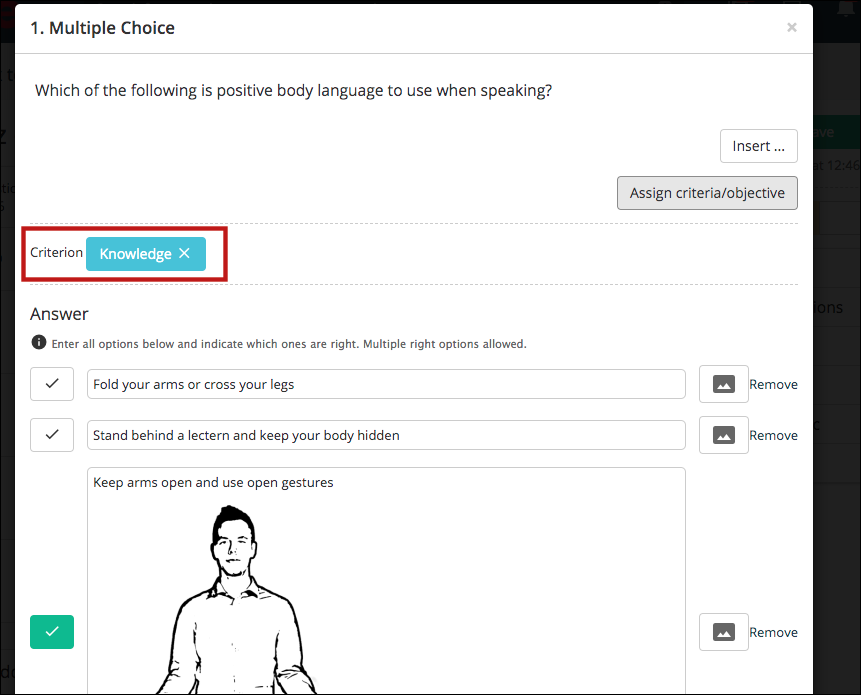
Earlier, as an instructor, you could assign objectives to specific quiz questions, in case SBGR was enabled on your site. Now, you will instead have the option to assign any criteria/objective from the attached rubric to the question.

All the criteria/objectives of the attached rubric will be available for you to select and tag to that quiz question.
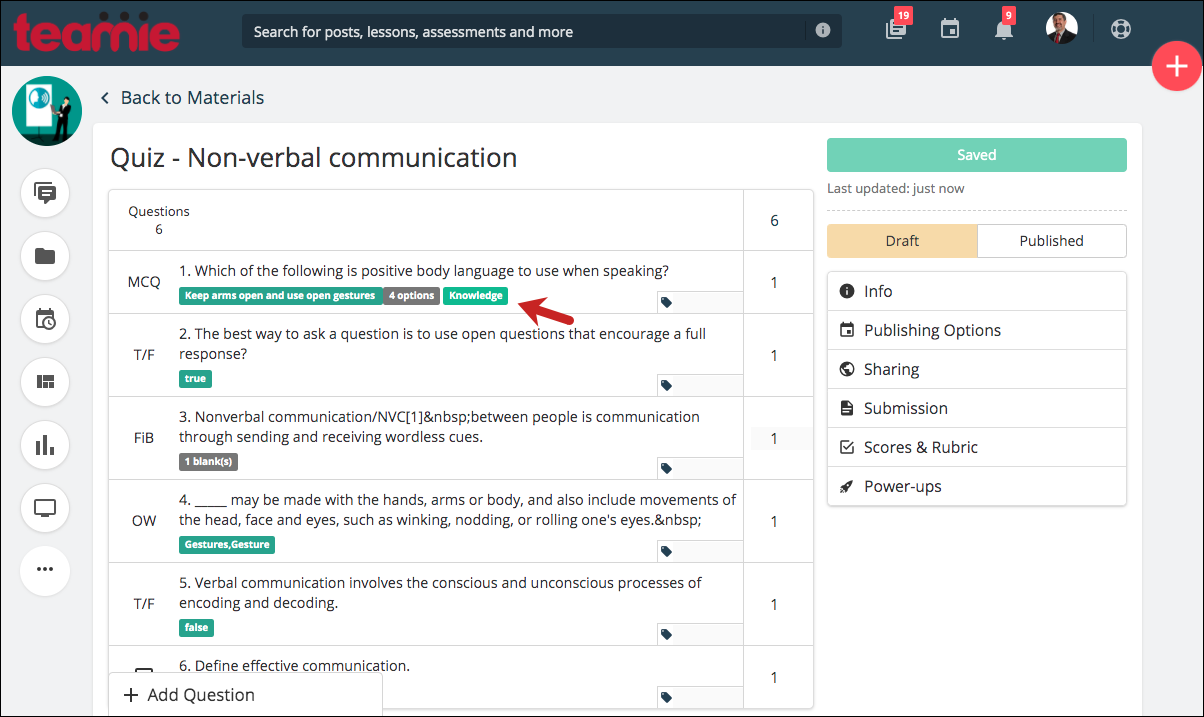
The tagged objective/criteria will also be shown on the quiz edit page.
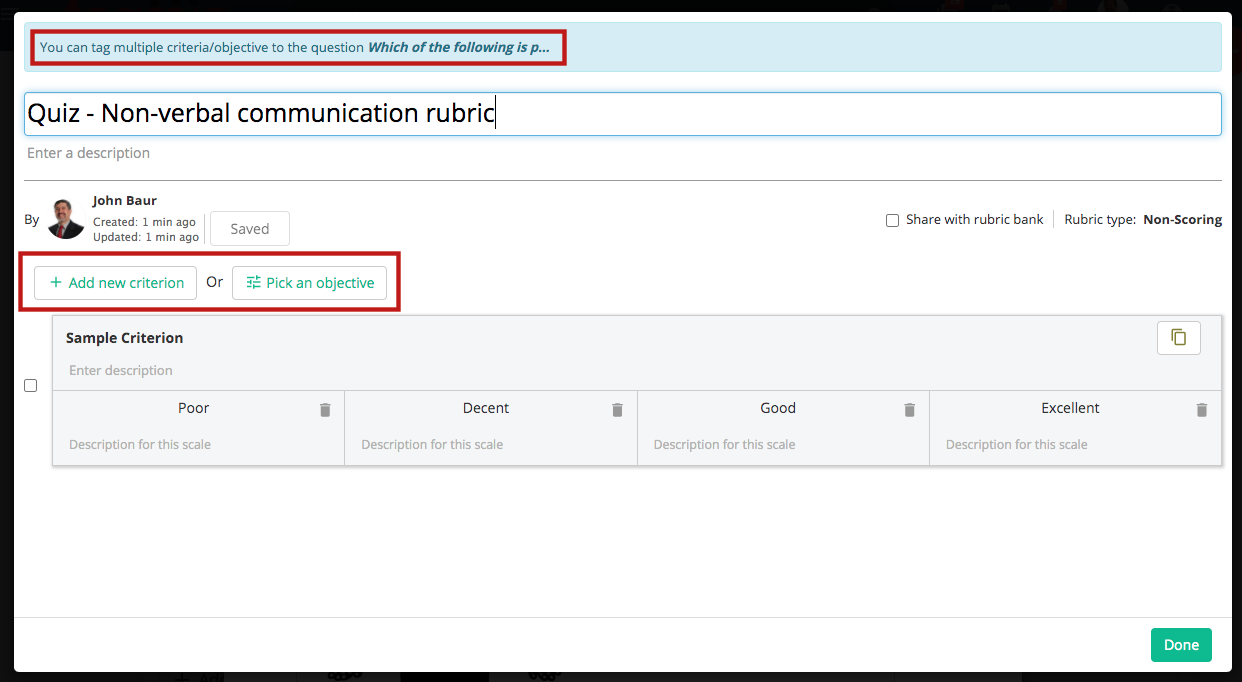
In case you try to assign criteria/objectives to a quiz question without attaching a rubric to the overall quiz, then a new rubric will be automatically created for you to add a new criteria or pick an objective, which can then be tagged to the question.
You can now grade the quiz using the rubric, which will be visible to the learners along with any comments that you give on their attempt.
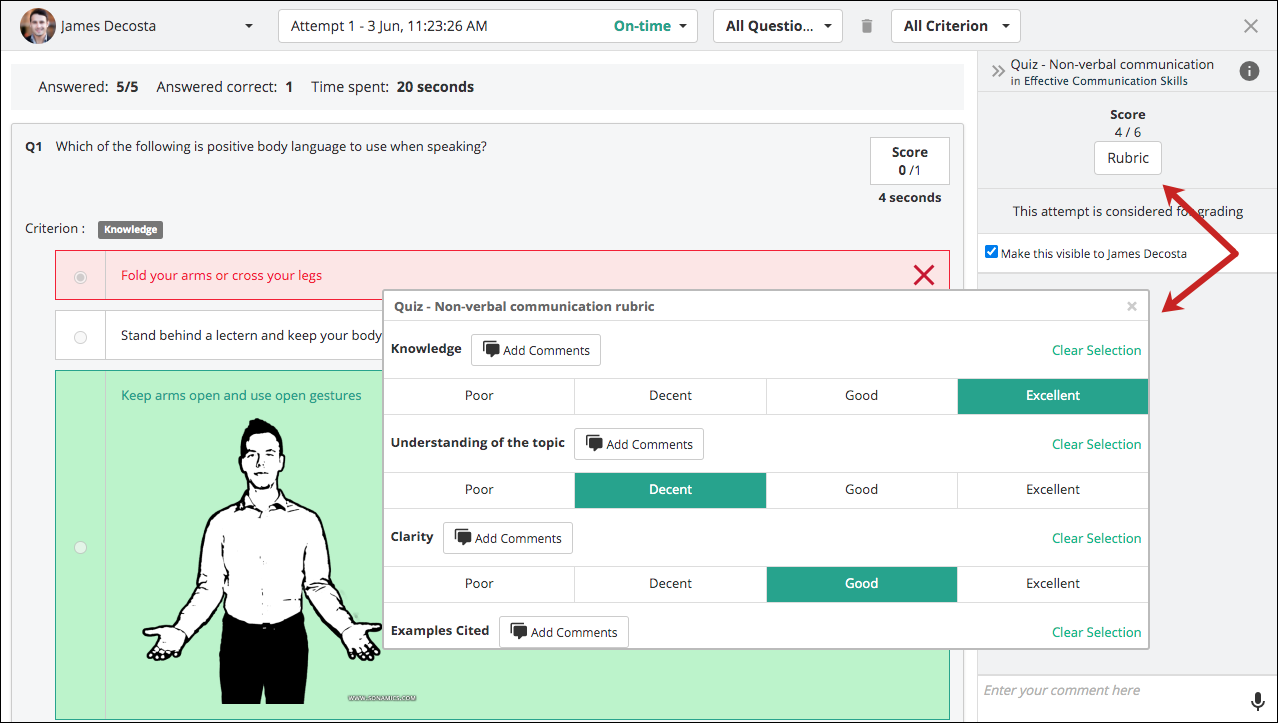
Similar to other assessments, the rubric criteria associated with the quiz will show up as individual columns in the rubric view.

For the sites using automation mastery, quizzes will also be included in the automated mastery calculation, with the same conditions as other assessment types. The automation will be triggered when the assessment
- Is summative
- Has been given a deadline/test date
- The attempt is graded.
This will bring uniformity in mastery calculations for all types of assessments.
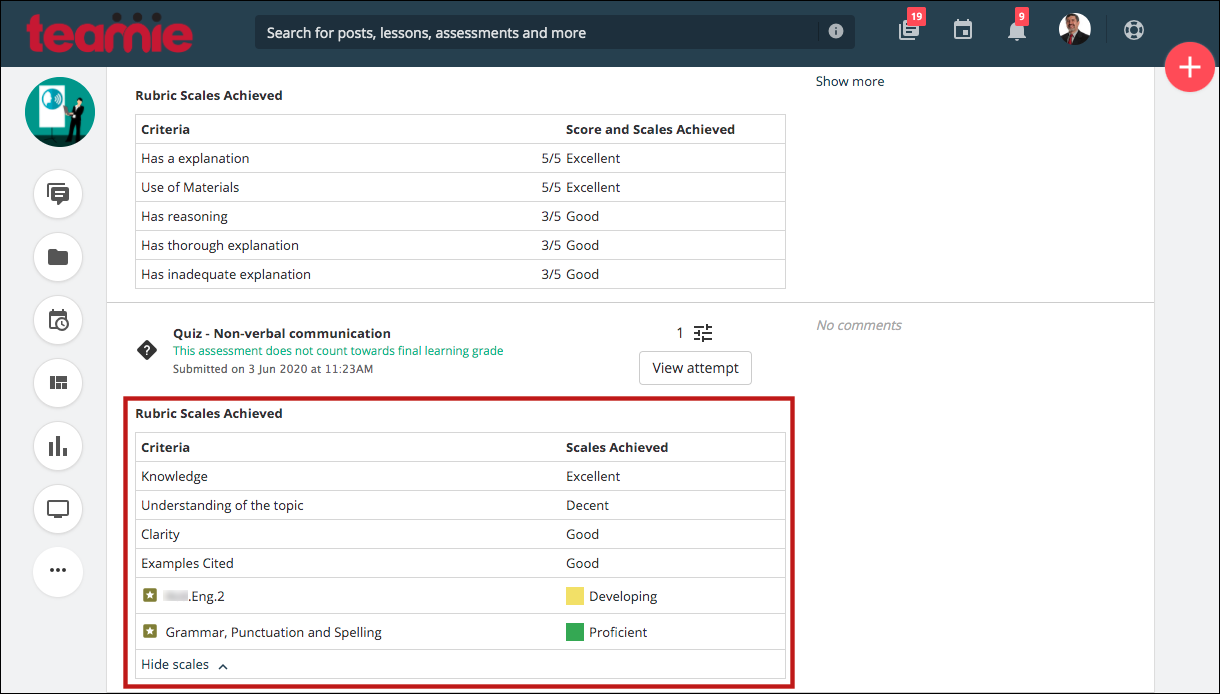
When the quiz scores are published, the rubric criteria will also be shown in the learner’s gradebook view under the quiz, with objectives (if any) highlighted.
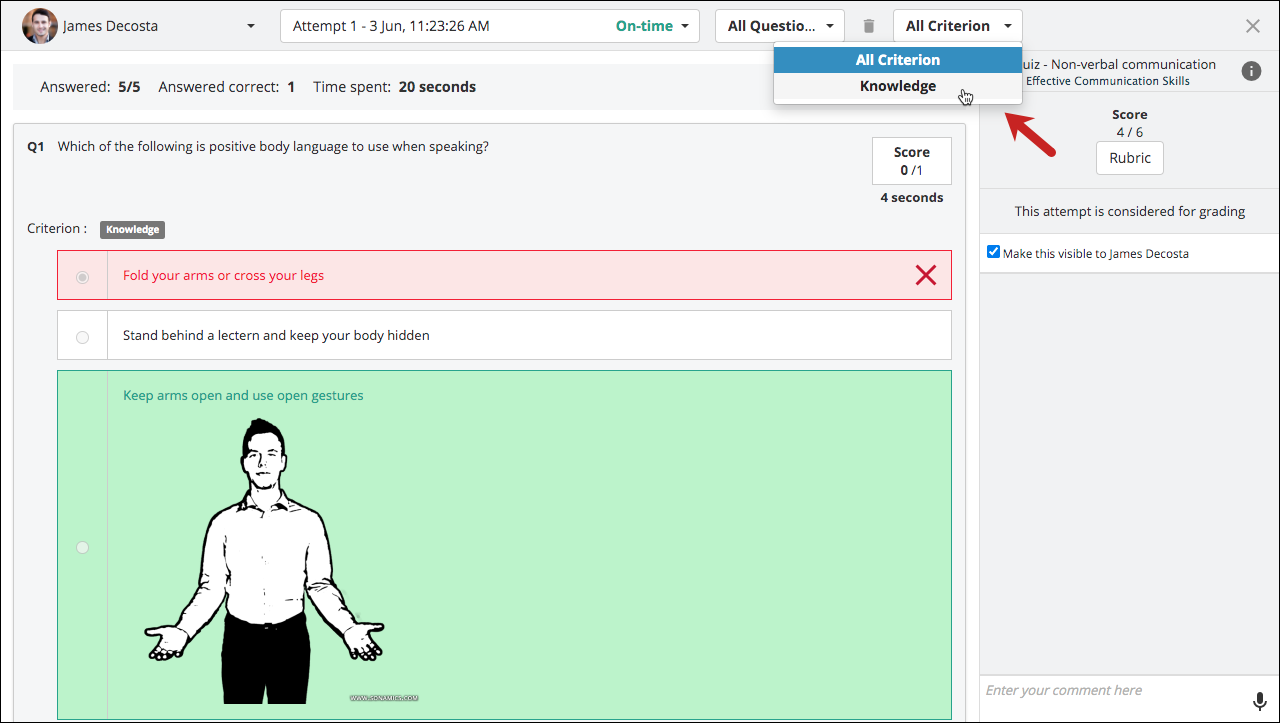
In the quiz attempt view once the learners submit the quiz, you can filter questions based on any of the tagged rubrics criteria or objective.
We hope these additions and enhancements made to the quiz workflows will help you leverage our powerful quiz engine even more. We would love to hear from you on any feedback that you may have on this!
Tagging quiz question while giving feedback
You can now link a comment to a specific question while giving feedback in a quiz. This can assist instructors to give question specific feedback to learners on quiz submissions. Furthermore, this tagging mechanism in quiz questions will make the feedback process much more simpler in quizzes with a large number of questions.
In order to tag a quiz question in a comment, start the comment by typing ‘q’ or ‘Q’. This will bring up the list of all the questions that were available to the learner to attempt.

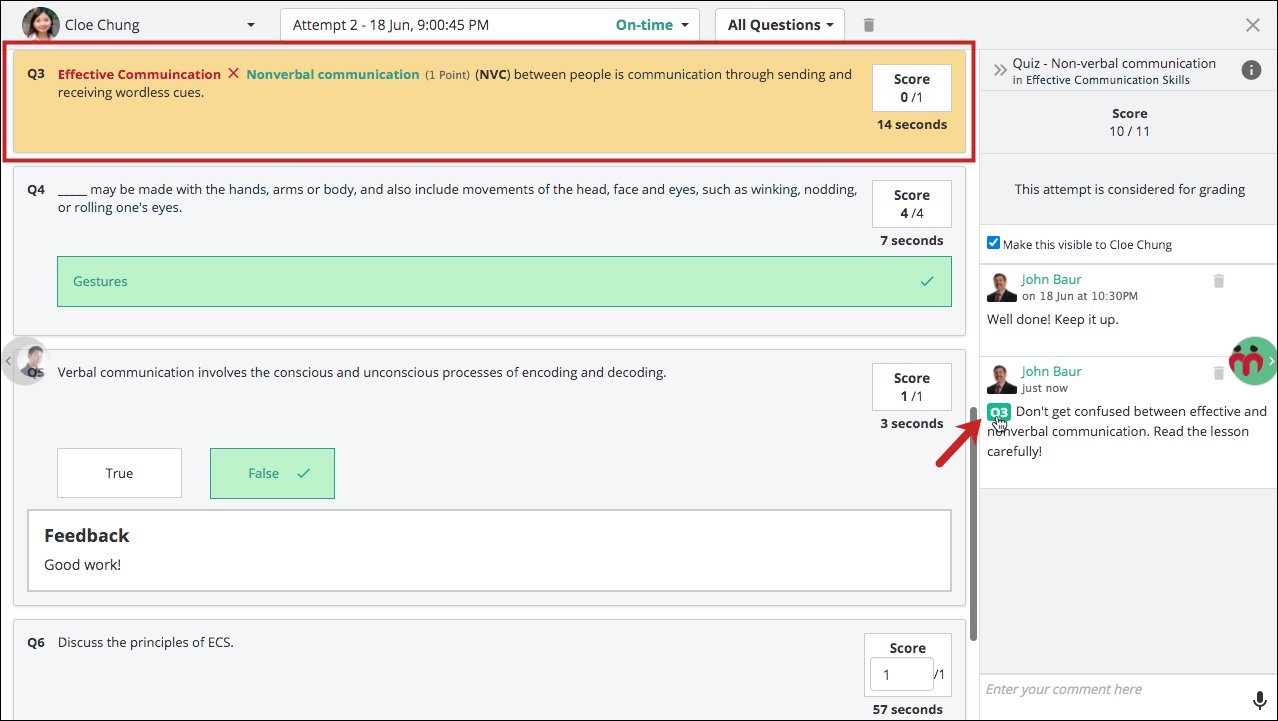
Click on the quiz question that you would like to tag in the comments section. Doing this will tag that question in the comments section, and the question number will be highlighted in your site’s primary color. You can also press enter after selecting the question from the list. For example, type “Q4” and then press the Enter key. Add the required feedback for the submission made for that question and click the Submit button.
| Note: You can only tag a question at the start of the comment by typing ‘q’ and not anywhere in between the comment. |


To make the overall tagging mechanism even more effective, we have made the tagged question label interactive. This means that tapping on a tagged question label in a comment will automatically scroll the screen to take the user to the tagged question. An easy on the eye animation will then indicate the tagged question.
While filtering a question from the All Questions drop down, the comments tagged with other questions will be hidden to show only the comments for that question and the comments for the overall quiz.


Kindly take note that the tagged questions will be shown as plain text without the tagged question label in the learners’ gradebook.
Zoom integration in calendar events
In our earlier updates, we introduced the Google Hangouts Meet integration using which instructors can link online video conferences to events created directly in their Teamie classrooms/modules. This Hangouts Meet conference can then be joined by the members of the classroom through Teamie.
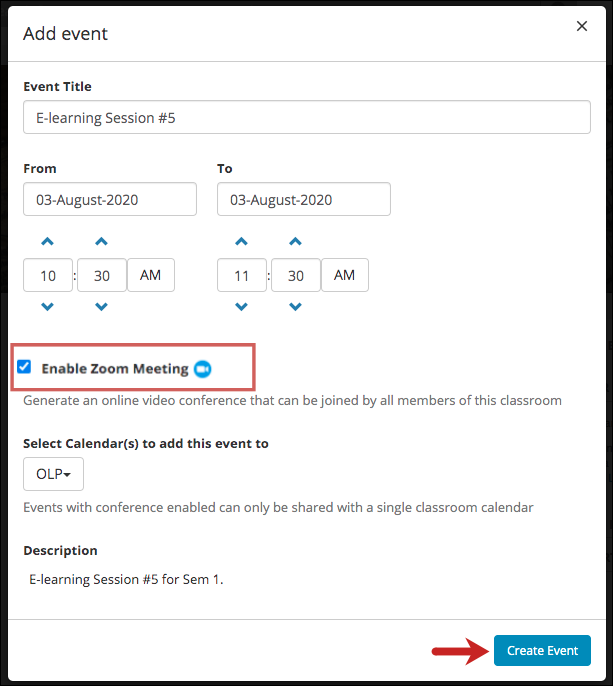
Similar to the Hangouts Meet conference, we have now enhanced our integration with Zoom to allow instructors to enable Zoom Meetings as an option while creating events for their classrooms.
| ? For the integration setup, users will need to have a valid Zoom account, which will be mapped to their Teamie account during the setup process. |

After the event is created, it will be added to the learners’ calendar with the link to join the meeting at the scheduled time. This can also be accessed by learners from their calendar through the Teamie mobile apps. Learners will also be notified of the Zoom meeting through email and bulletin board notifications.
| ? In case both Google and Zoom accounts are mapped for a user, then both the ‘Enable Zoom Meeting’ and ‘Enable Google Hangouts Meet’ option will be available for the user to tick. |
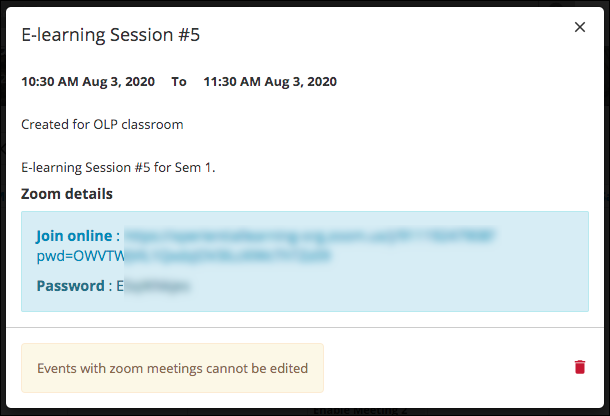
Once the meeting is done, the recordings (if available) will be linked to the event based on the site-level configuration for the Zoom recordings. Similar to the Google Hangouts Meet events, the Zoom meeting events can only be deleted and not edited.
In our earlier updates, we also integrated Zoom using the LTI standard, which creates a tab inside a classroom from where instructors can create Zoom meetings and learners need to navigate to the Zoom tab to join the meeting. Unlike the current integration with calendar events, the LTI integration doesn’t create any calendar events nor the learners can join the Zoom meeting through their Teamie mobile apps. Kindly note that only one type of aforementioned Zoom integrations can be enabled on a site at a time.
Exporting the list of all the calendar events
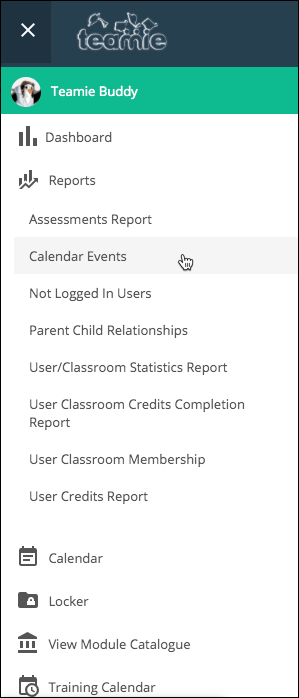
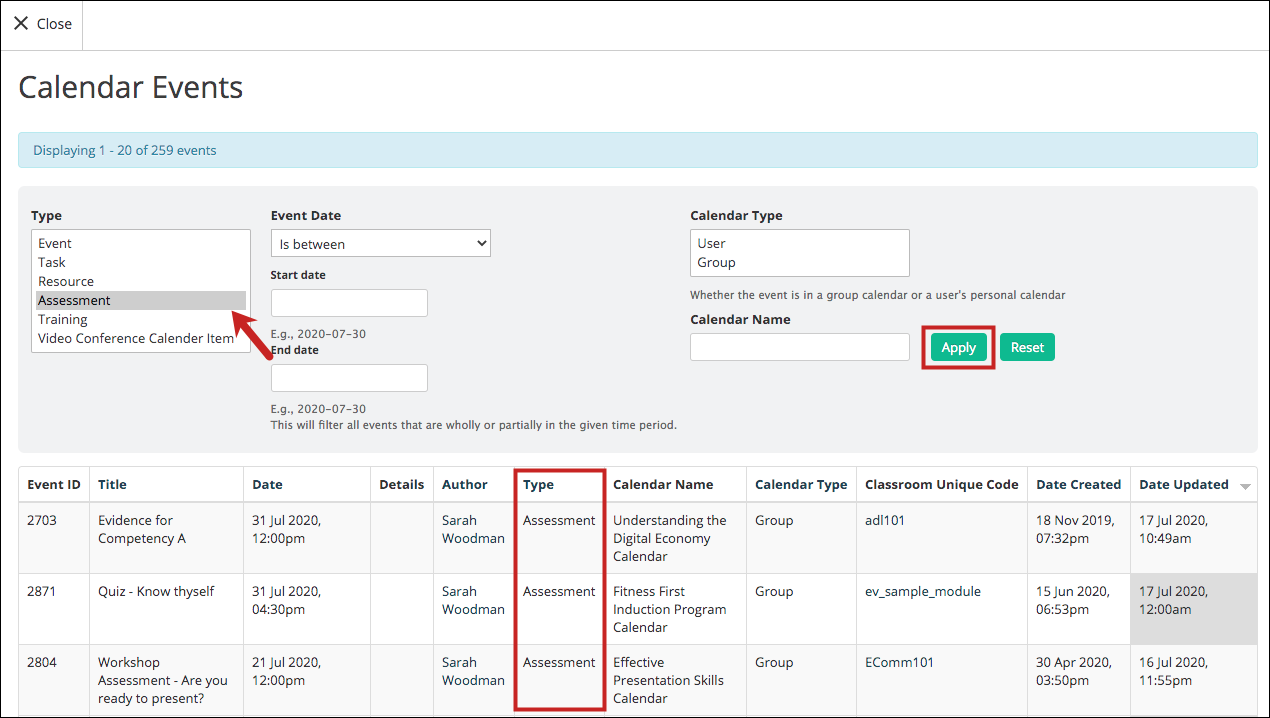
As an administrator, you will now have the option to export the list of all the calendar events that have been created on your site. You can access the Calendar Events page from the Reports menu.
On the Calendar Events page, you will be able to view all the calendar events on the site, whether they are directly added by users or created for a task post or materials etc. You can view important information pertaining to each calendar event, such as its title, date, details, author, the calendar it is created for, when it was created, and when it was last updated. Having all this information makes it an incredibly useful tool to manage and export the different calendar events being created on your site.
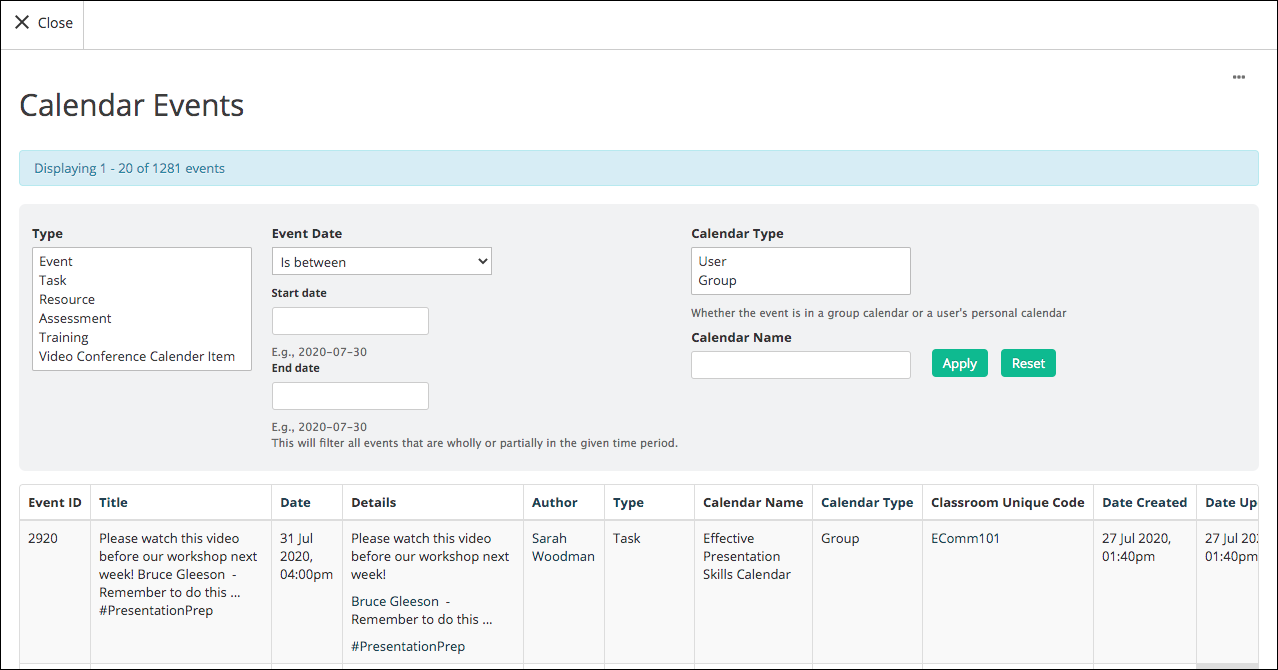
You have different filters available to quickly update and view the treasure trove of calendar events.
Filter calendar events based on the type of event:
Filter calendar events based on the date of event:

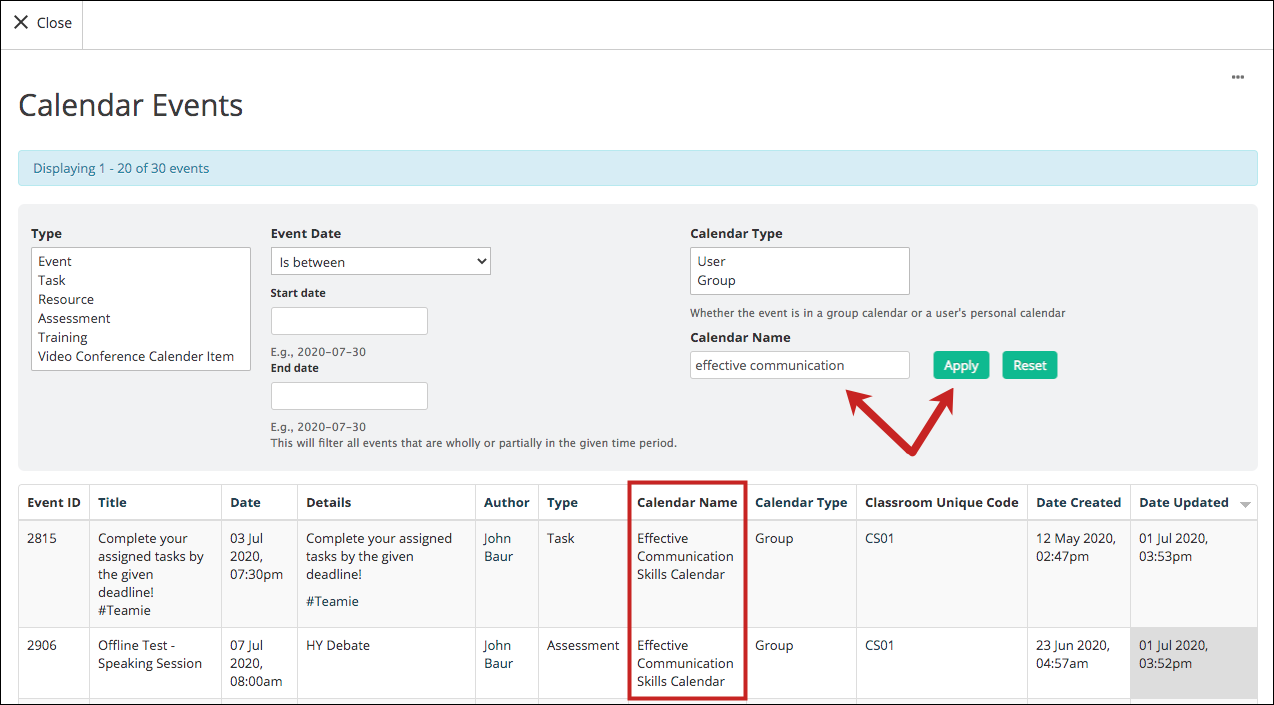
You can also filter calendar events based on the type of calendar (whether the event was created for a classroom calendar or for a user’s personal calendar):


Last but not the least:
Filter calendar events based on the calendar name for which they were created:
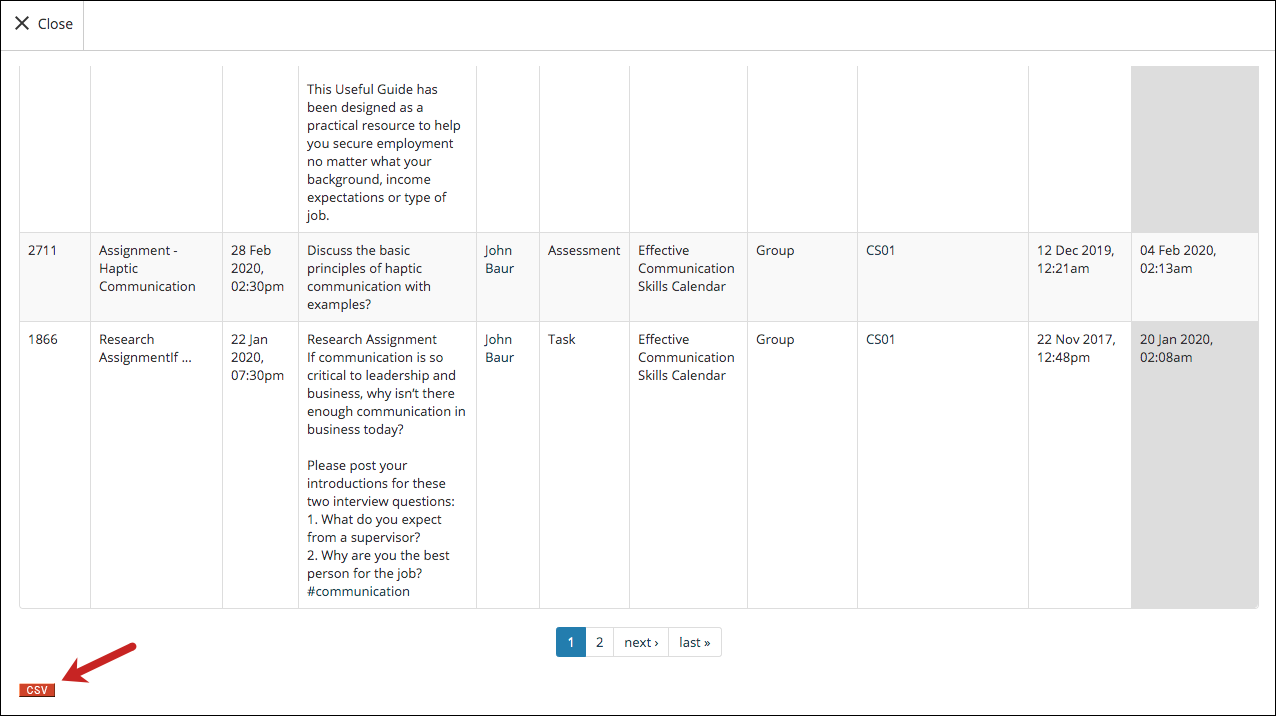
Once you have filtered the calendar events as per your requirement, you can easily export them, from the bottom of the page, in the form of a CSV file, which you can use to get an even more targeted analytics.

Minor Enhancements
Following are some minor enhancements that were rolled out to smoothen some of the existing workflows.
Configuration to always show materials overview in lesson pages
Whenever users are on a lesson page, they have the option to view the overview for all the materials that are available for them in that classroom. This is known as the Materials Overview, which can be accessed from the hamburger menu button on any lesson page.
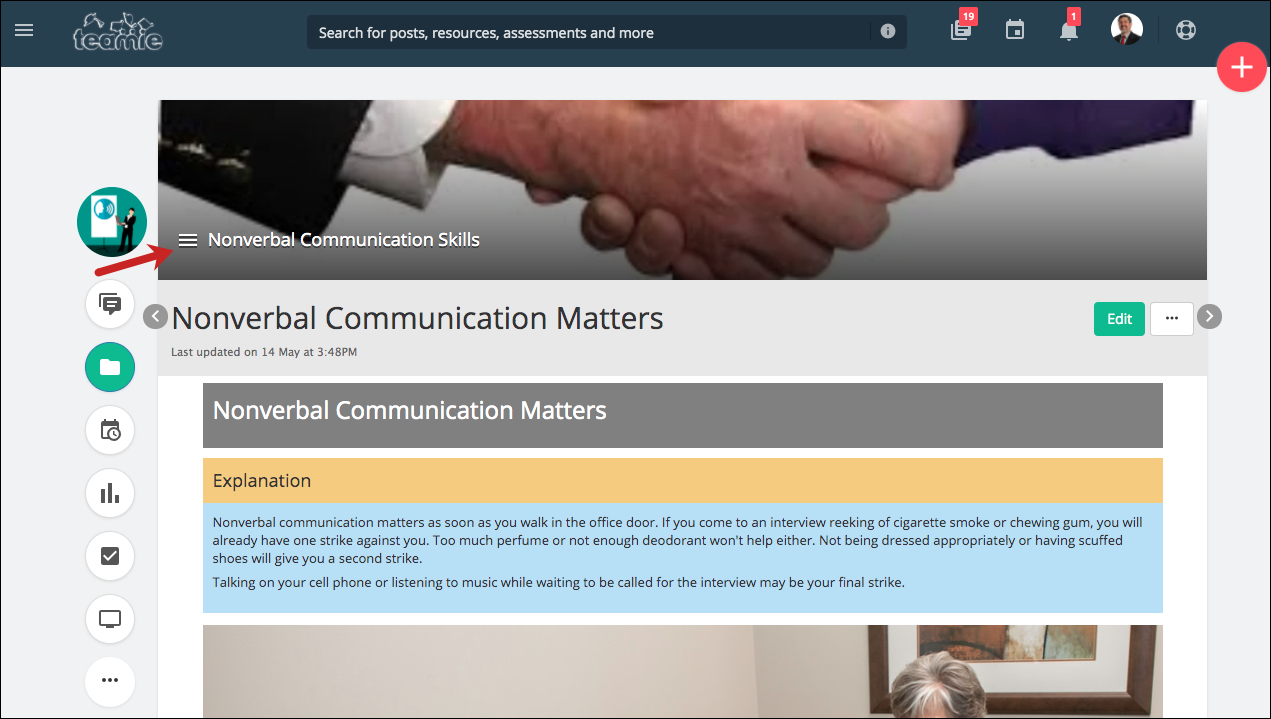
Clicking this menu button opens the Materials Overview section of the classroom on the left hand side of the lesson page.
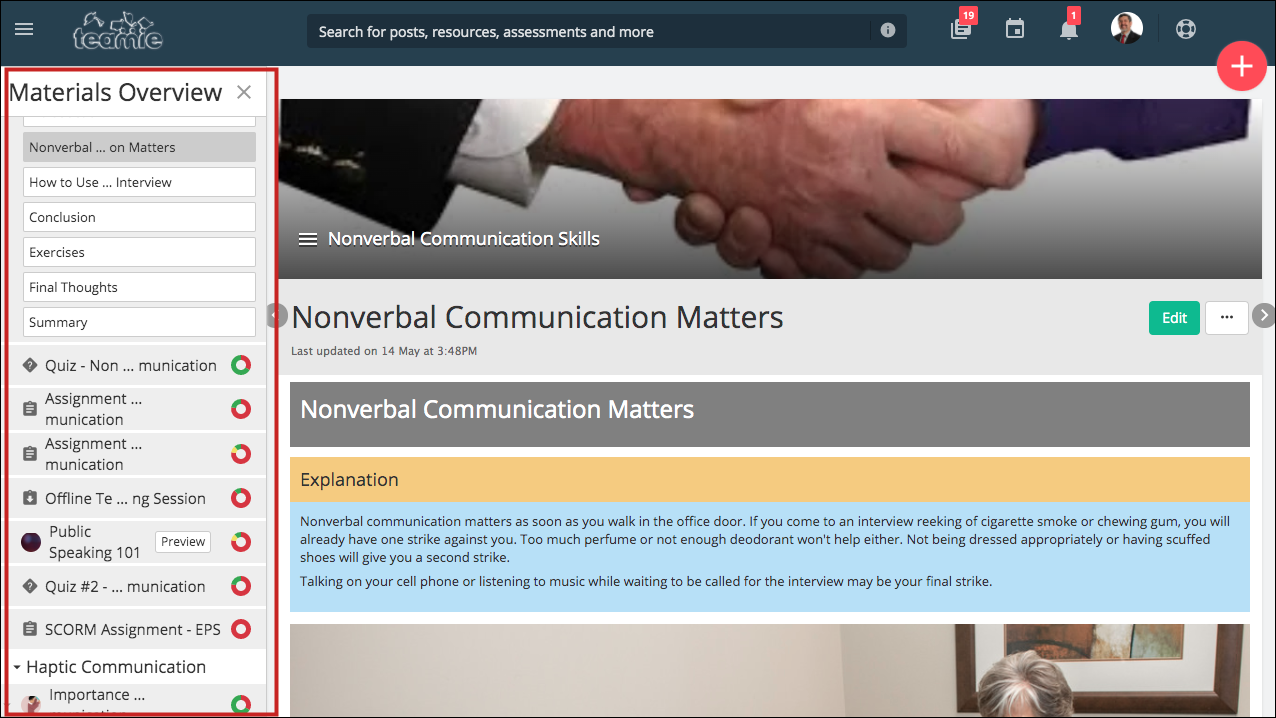
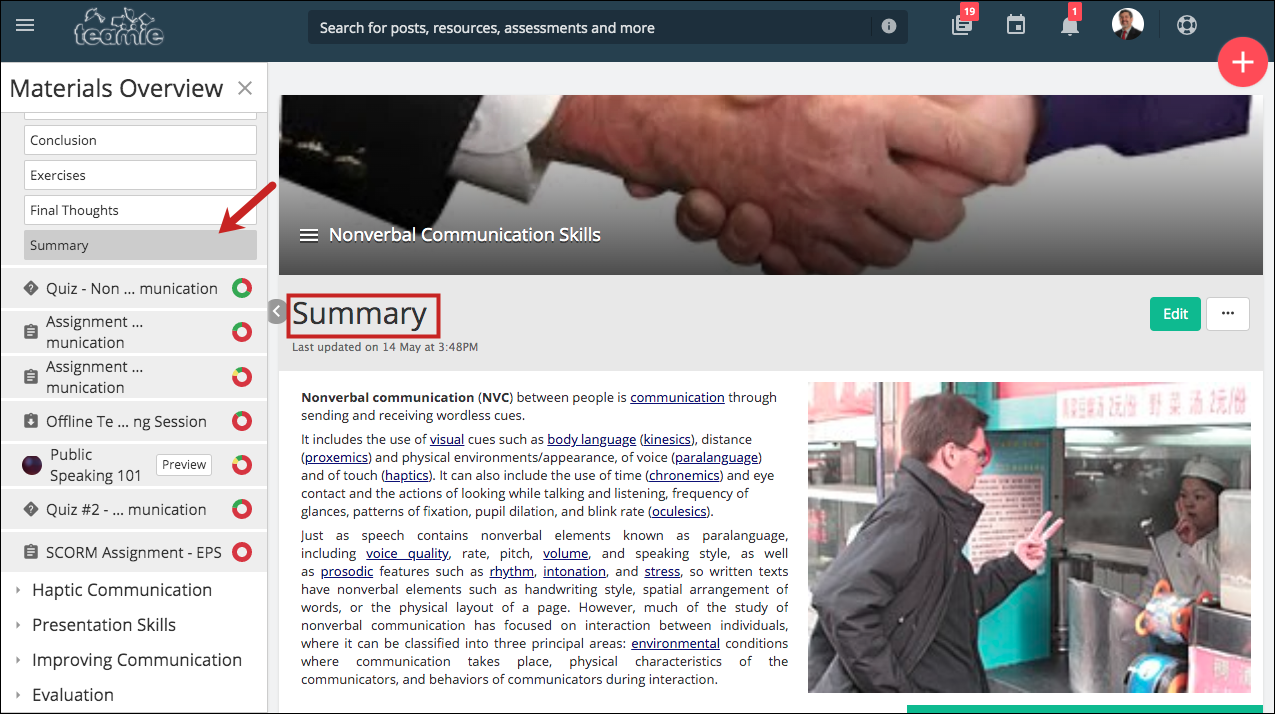
This can help users to quickly view the available materials and navigate to them in a jiffy. But this option is subtle and can sometimes be missed by the users. Therefore, we have created a site-level configuration to automatically show Materials Overview when viewing a lesson page. If enabled, the system will automatically open the Materials Overview whenever any user opens a lesson page. Users can then navigate to any other lesson page or material from the Materials Overview section.
| Note: For laptop/tablet screens with resolution less than 1280px, this configuration will not open the Materials Overview automatically. Users will need to open the section (in the form of a floating popup) themselves by clicking the hamburger menu icon. |

This configuration can be enabled from our end. So, if interested, write to us or contact your Teamie account manager to enable this configuration on your site.
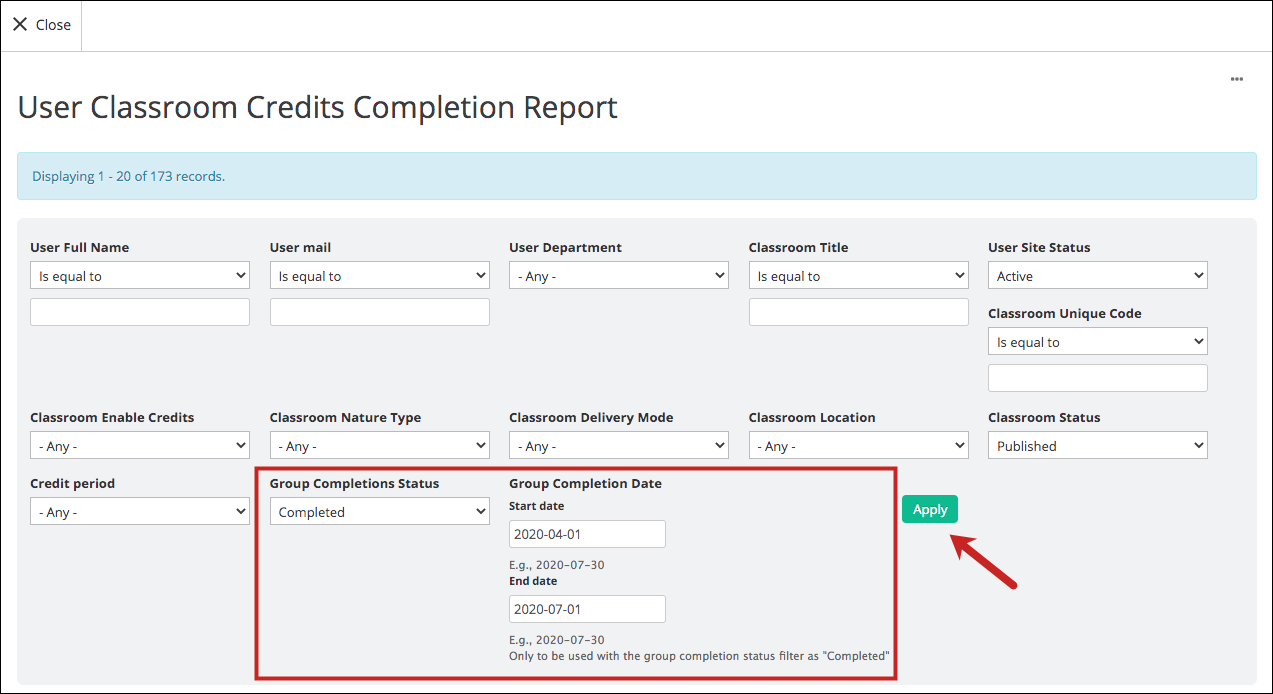
Completion date filter for group credits completion view
We have added a new filter on the User Classroom Credits Completion Report page – Group Completion Date filter. This filter is intended to work in conjunction with the Group Completion Status (Completed) and will allow administrators to narrow down and filter the results of users who have completed the assigned groups between a particular interval of time.

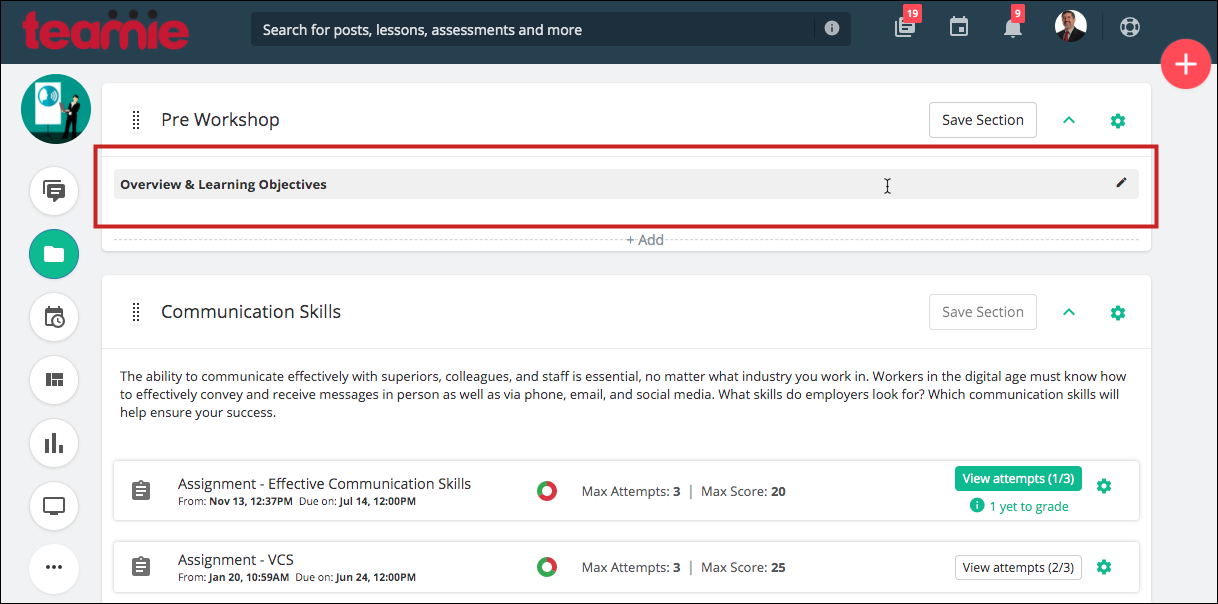
Customising section description, lesson description, and lesson page titles
Whenever an instructor creates a section or a lesson, there are certain description and title fields that are pre-filled, by default, in order to assist the user. You can now decide at the site-level in case you wish to customise the aforementioned and add descriptions and titles that are more relevant to your institute or organisation. The customisation is available for the following:
Section Description:

Default
Example of a customised description
Lesson Description and Lesson Page Titles:
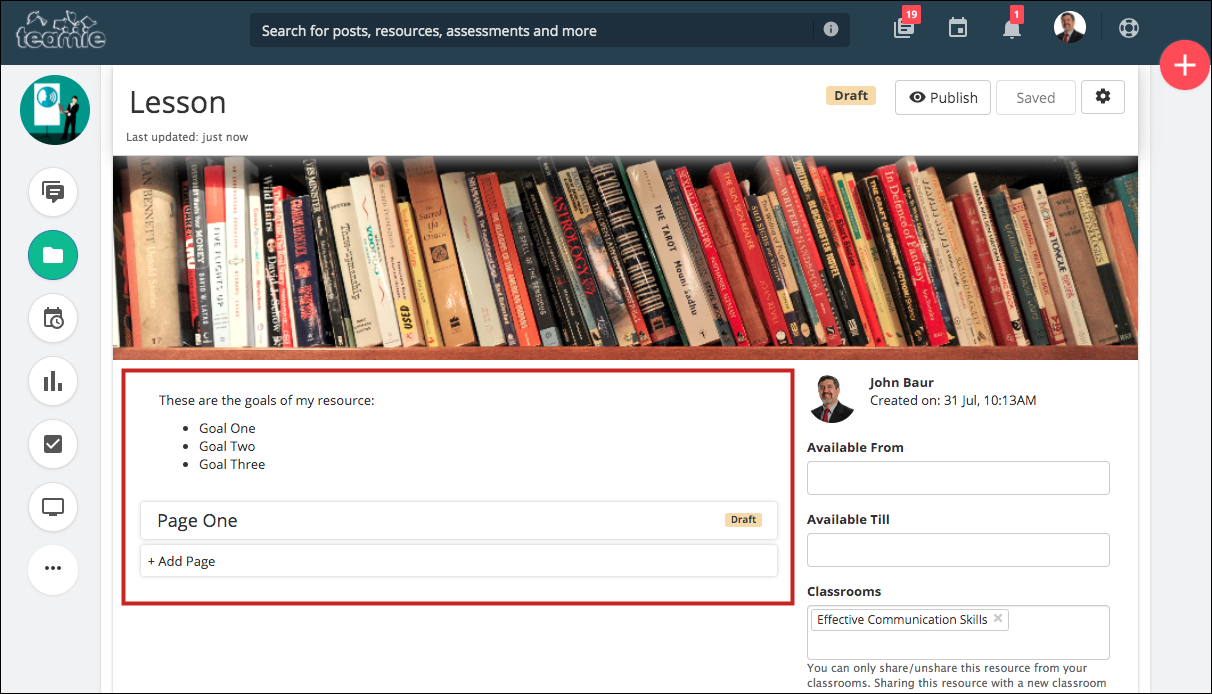
Default

Example of customised lesson description and lesson page titles
As aforementioned, these fields are customisable at the site-level, and you need to contact us or your Teamie account manager to customise them.
So, that’s it for this update. See you soon! Do give us a shout-out in case this update improved your learning experience. Till then, stay safe and stay collaborative!